Optimist Tuning Guide
GETTING STARTED, RIGGING THE SAIL
Begin with tying the line at the three corners, clew, tack and throat starting from the clew. To do this, you will want to use the larger diameter lines provided with your sail (3mm diameter). Refer to the pictures for how to tie the throat and tack.
Once you have the three corners tied, rig up the sprit. Note that the sprit has a point on each one of the ends, and the peak of the sail has a looped line, put the upper sprit end through this looped line. Loop the short wire that controls the sprit tension over the opposite end. Note that the sprit has a little plastic cover, to protect it from chafing on the mast, make sure that you rig the sprit with this end down. Another suggestion is to rig the sprit on starboard side. Usually you start the race on starboard tack and this will give you the best speed off the start line.
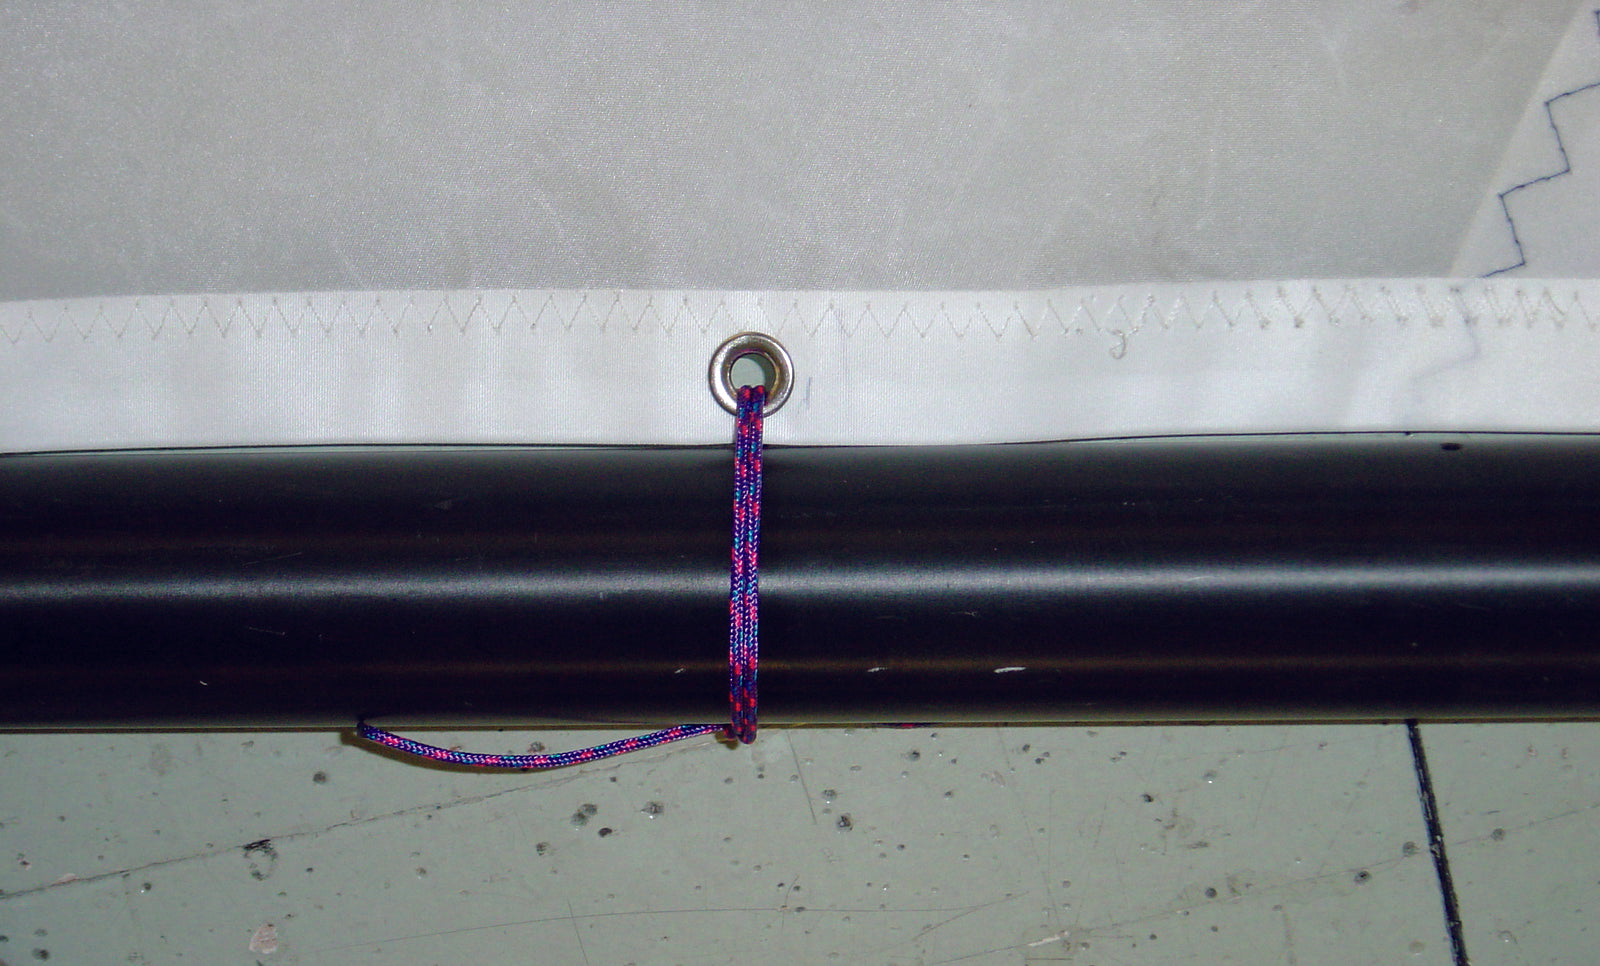
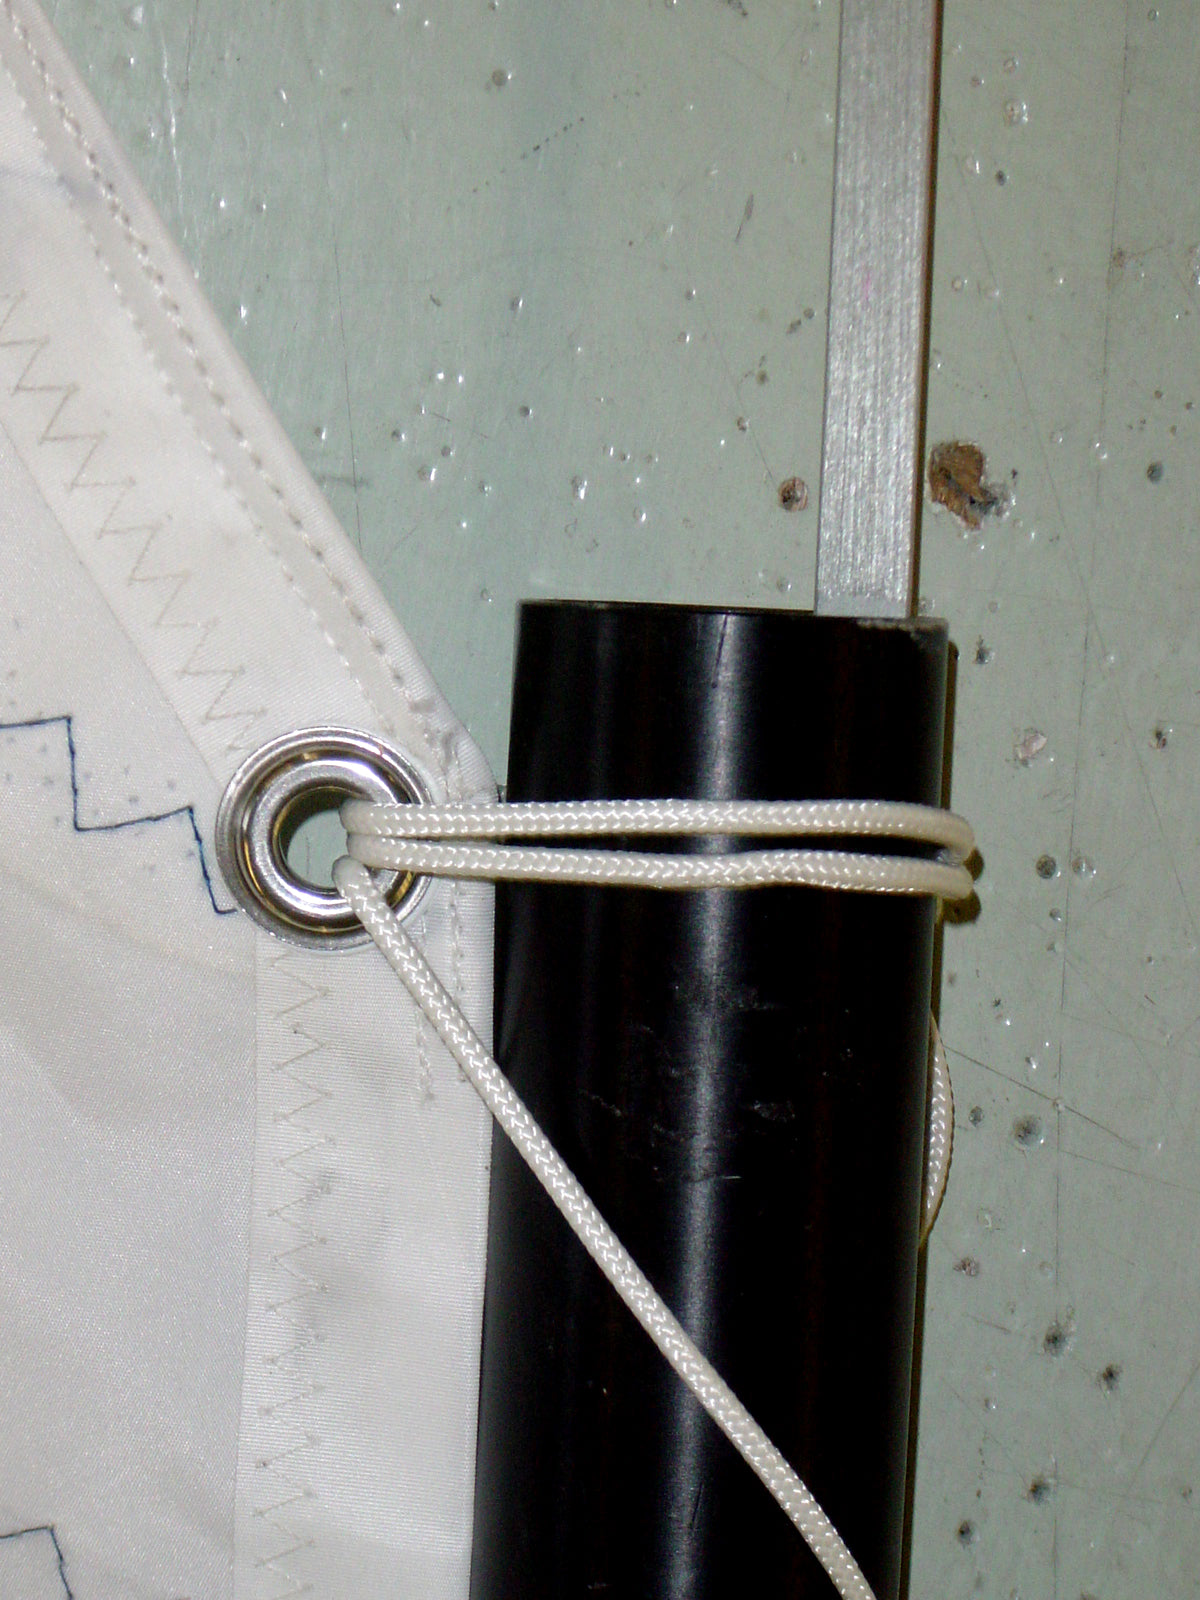
Once you have everything rigged (outhaul, sprit, vang, top and vang preventer, and corners), put a little bit of tension on them, and then tie the sail ties to all the remaining grommets using the 3mm diameter line provided using a square knot. We suggest you tie these with two wraps around the boom. Keep in mind that the lines on the boom are tied loose (not more than 10 mm away but as close to that as possible), and the lines on the mast go tight (but not tighter than 1 mm). See the pictures as a guide. Don’t forget to tighten your knots very tight, if not, the knots will come undone when the sail luffs.


SECTION 1: THE LEECH
MAINSHEET
Upwind
Properly trimming the mainsheet is key. Consider it the accelerator on your boat and do not be afraid to play it. The best sailors are constantly adjusting their mainsheet as their boat sails through the water, adjusting it for each change in the water and wind.
In general, the sail should be trimmed so that the boom is always above the leeward corner of the transom (See picture). This will keep the leech at the right angle to the wind. To point higher, trim the sail tighter and to sail lower and faster ease the sail slightly. You might even want to put a small mark with tape on your mainsheet to help you gauge how tight or loose the sheet is.
You will notice that your new sail has a telltale sewn to the back end of the top batten. This telltale should always be streaming about 50% of the time. If it is always stalled behind the sail, your mainsheet, sprit or vang may be too tight. See more about the sprit and vang below.
It’s always a good idea to give the sheet a little ease before hitting a big wave, because it will open your leech and give your boat a boost to power through the wave without slowing down. Make sure you head down as you ease and chose a mainsheet that will not absorb water, we suggest 6mm.
Downwind
Downwind, we suggest that you have a long sheet so that you can let the sail out all the way. You want the angle between the boom and the middle of the boat to be 90 degrees, but still have some slack in the sheet to be able to pump and regulate your heel. Tie a knot once it is at 90 degrees.

SPRIT
Upwind
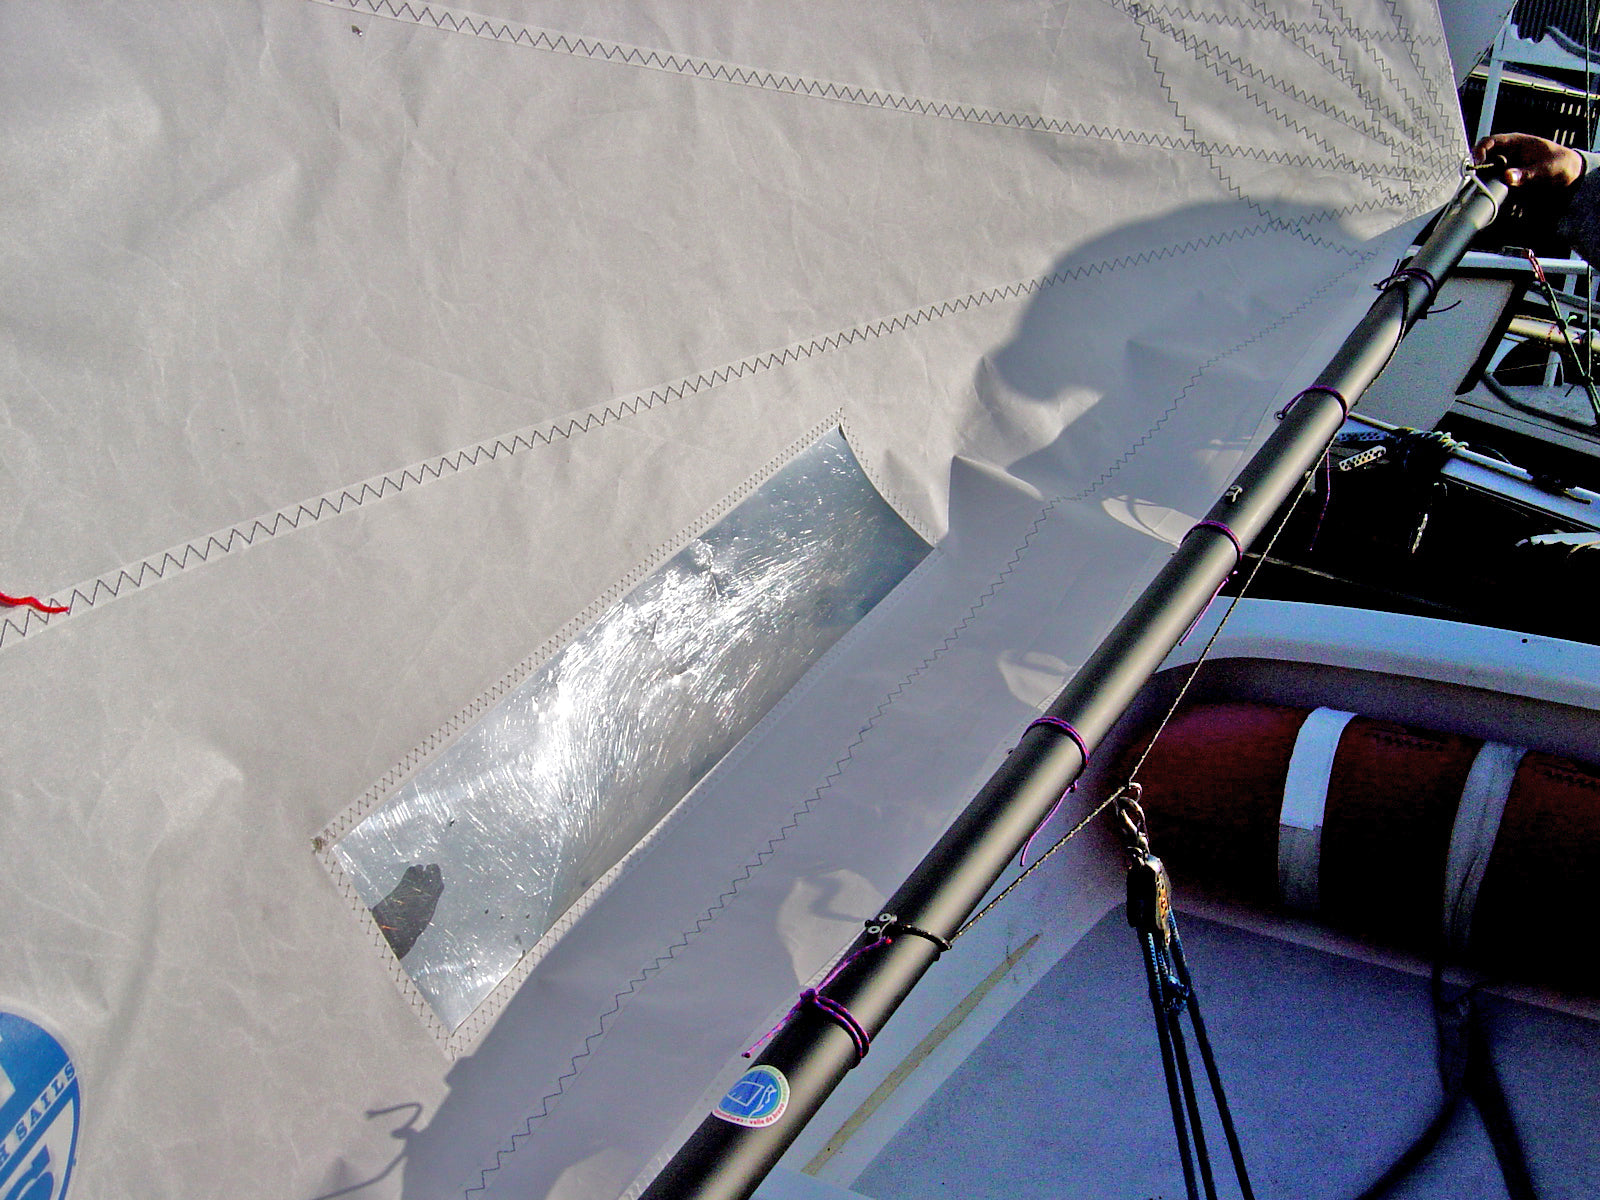
The sprit controls the leech tension. It has big influence on the leech and when you tighten it, you will tighten the leech. The way you want to have the sprit in all conditions, with the exception of heavy air, is so there are no diagonal wrinkles at all. (see picture of too much sprit tension) A little wrinkle perpendicular to the sprit is not a problem and is preferred (see picture). In light air you actually want to have this small wrinkle, so that you are sure the leech is not too closed or tight. The basic rule is always have the sail fly smooth or with a slight wrinkle coming off the throat.
Heavy Air
As long as you can sail the boat flat with the main all the way in (not further in than the corner of the transom), then you would set the sprit tension as described above. If you start having trouble and you are hiking all the way out but still can’t sail flat, then you should ease the sprit a little bit, allowing it to wrinkle from the throat to the clew, this will twist open the leech and depower. Also pulling the centerboard up 3 inches up will help a lot. Note that like many other boats, the Opti likes to be sailed flat upwind. Sailing the boat flat upwind will keep it from slipping sideways upwind.
|
 |
 |
DOWNWIND
Light Air
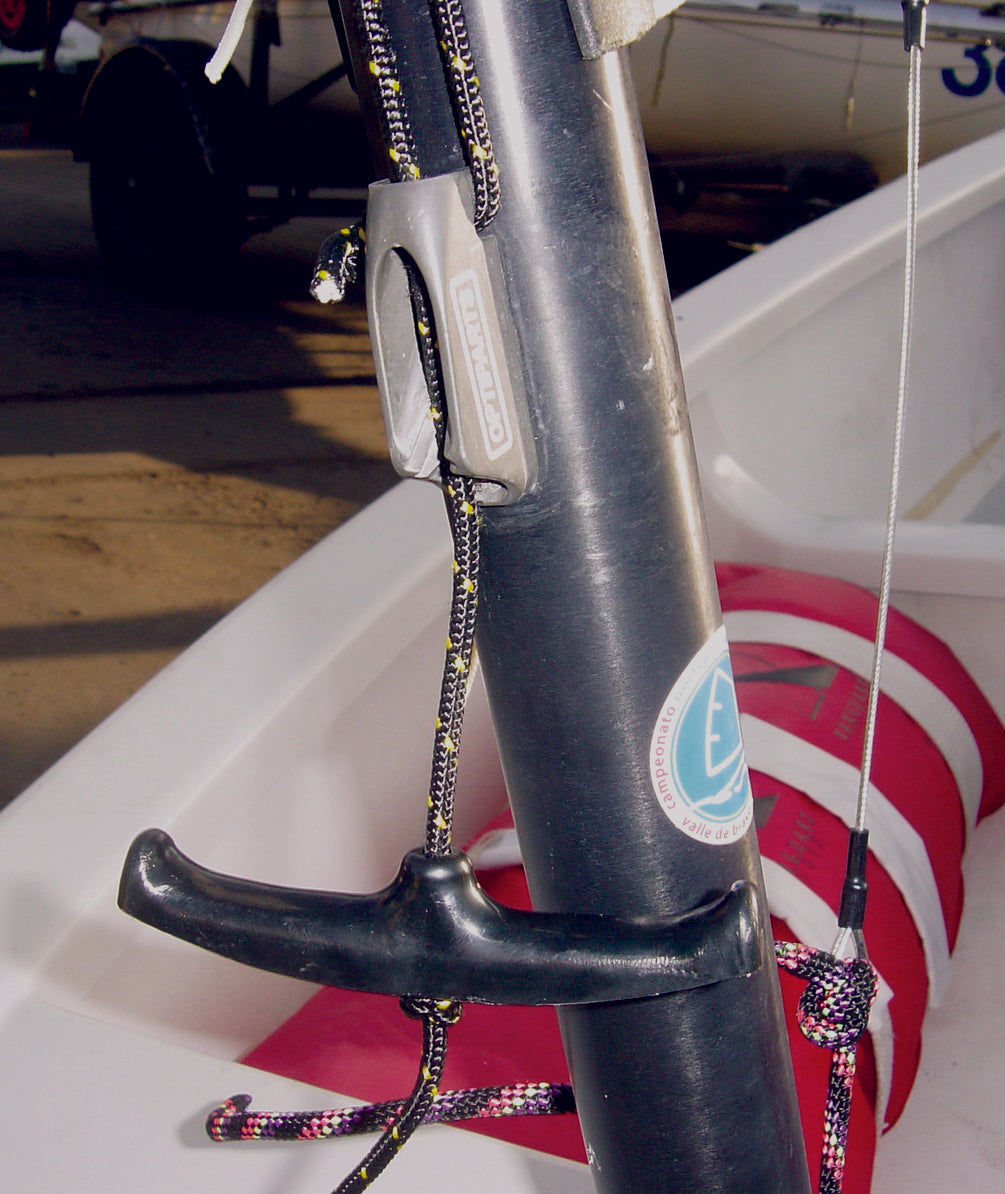
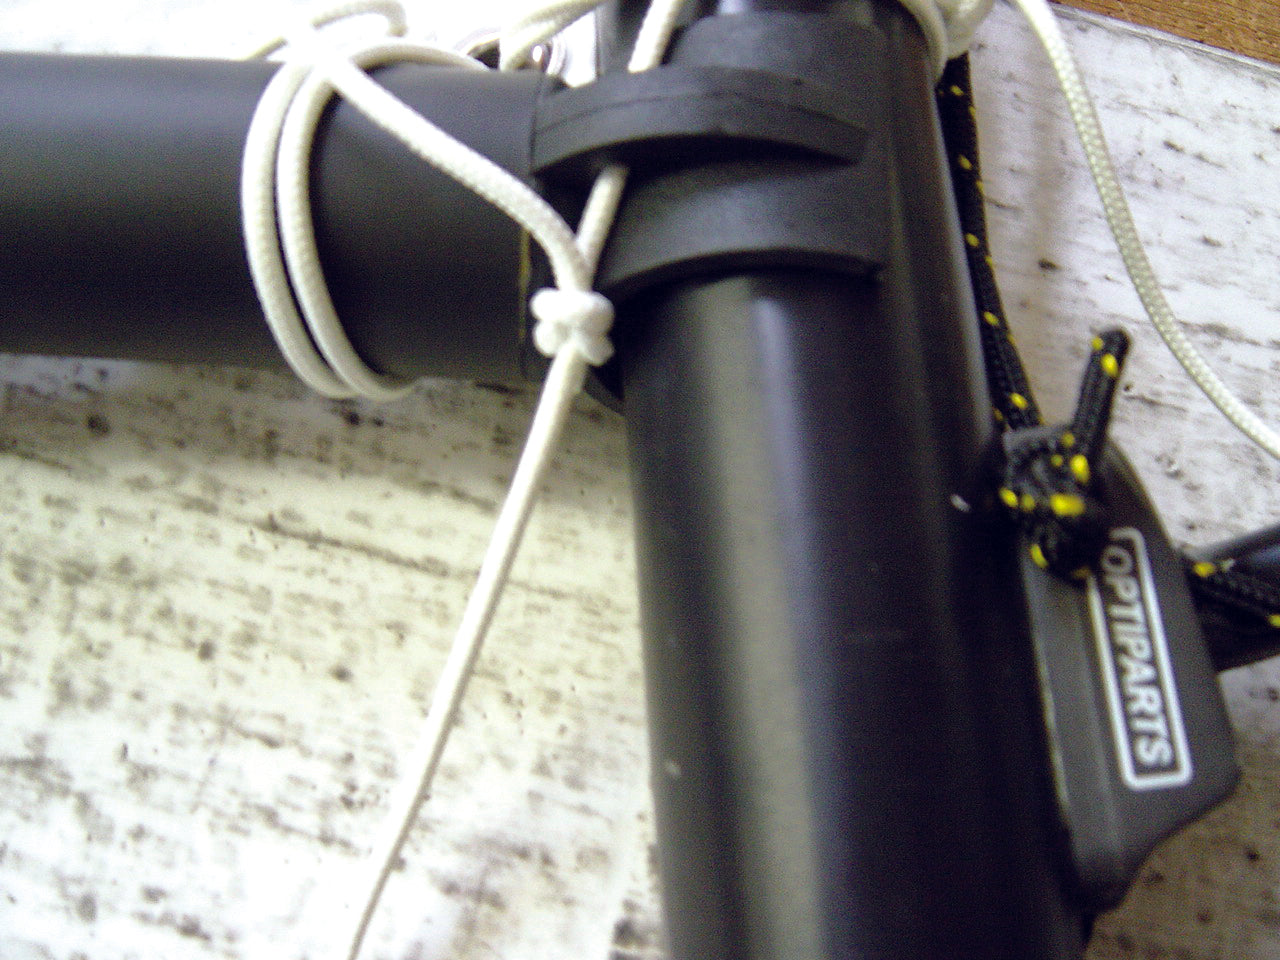
When you head down and ease the sheet, you will see a big wrinkle that goes from the tack to the head, showing the sprit is too tight. You want a little bit of sag in the leech sailing downwind, so once you head down slide to the bow and ease the sprit a little bit so that you don’t have any vertical wrinkles at all. To be able to do this easily you should have a handle tied on the sprit line, as close to the cleat as you can, but still allowing you to release it (see picture). Try not to have the handle tied far from the cleat because it will be real hard for you to trim the sprit back on before rounding the leeward mark.
Heavy Air
Only if it is windy (more than 13-14 knots), do not ease the sprit at all for the run. In heavy air you want to keep your weight back in the boat and moving forward to ease the sprit will make the boat unstable and hard to control.
VANG AND PREVENTER
The vang has a similar set up for upwind or downwind sailing. You want to have the vang tight so that the leech doesn’t twist open too much. In very light conditions do not tension the vang too much, you just want to be able to sail downwind with the leech straight and not allow the boom to move upwards at the clew.
In heavy air you want the vang very tight, if not, it will be very hard to stabilize the boat on the downwind run. If the leech is open, you will most likely flip over. One way to not capsize is by pulling the sail in, but as we suggested before, you’ll get the best out of your sail if you let it out to the 90 degrees. The best way of trimming your vang is to pull the sail in all the way up to the middle of the boat. Most likely you will be pointing straight into the wind, sheet in hard and slide forward to cleat the vang tight.
The basic rule of thumb is that the top batten on the main should always be parallel to the boom if the batten is angled in or out from this position, the vang could be too tight or too loose respectively.
The vang and preventer work together. Even if you tighten your vang really hard if the preventer is not on, the boom will still move upwards at the Clew because it will be able to slide down where it meets the mast (gooseneck).
The preventer is the controller that controls the tension on the luff of the sail, this is very important because the luff tension moves the draft of the sail forward or backwards. If the luff is tight this moves the draft forward, if it is loose the draft moves back. Also, the preventer keeps the boom from sliding down when tensioning the vang, which in turn is key to keeping the leech tight.
Try tightening the vang without the preventer. Push the boom upwards and see what happens. You’ll find that it only tensions the luff, and not the leech, just the opposite of what you want.
OUTHAUL
The outhaul also modifies the shape of leech. The tighter the outhaul the straighter the lower back end of the sail will be. The looser the outhaul the rounder the lower leech of the sail will be.
In light air, you will want to see wrinkles perpendicular to the boom, if you see the wrinkles and the foot of the sail is too bumpy then the outhaul too loose. Make sure the wrinkles don’t go higher into the sail then the first seam.
In heavy air, where you are overpowered and cannot control the boat and you have a lot of helm, tighten the outhaul hard, and put a big wrinkle parallel to the boom. The angle of the lower batten is a big influence for the helm, so the rounder it is the more helm you get because the angle of the lower leech is pointing to weather.
The outhaul is another power source for the boat, the looser and rounder the foot, the more power you have to go through waves and accelerate fast. But also, the looser and rounder the less you can point, so find your balance by speed testing.
SECTION 2: THE LUFF
PREVENTER
In light air you want the preventer tight (with two twists), so that the luff is loose. You do not want the luff so loose that there are wrinkles parallel to the boom coming from the grommets along the luff, but loose enough to allow the sail to switch easily from one side to the other without any trouble when you tack.
In general, you never want any wrinkles at all along the luff. Wrinkles caused by the preventer being too tight would be parallel to the boom and the too loose (or untwisted) wrinkles would be parallel to the mast. Have your preventer set up so that you never twist the line more than twice in light air. Do not twist the lines at all in heavy air. When you do not have any twists in the line, make sure you do not have a big wrinkle parallel to the mast indicating that the luff of the sail is too tight. We suggest using a square knot on the low side of the boom, having the two ends of the line tied together, instead of two stop knots next to the holes. You need to play with it, twisting and regulating its length by the square knot (See picture 1493). The line should be 3 or 4 mm thick and be very low stretch.
SAIL TIES
Note that the rules allow you to have the edge of the luff or foot of the sail no further than 1 cm from the mast or boom.
On the boom, you want to have the sail ties as long as you can within the rules so that when you tack the sail switches sides easily. The sail ties should all be as loose as you can, no matter what the condition may be. On the mast or luff, you want the ties tight, but again, allowing the sail to switch sides. The perfect range would be 1 mm away from the mast, but make sure that the knot is tight so that it doesn’t become any looser than that. The same goes for the corners, 1mm, no matter what the conditions may be.
Make sure that the ties in the mast or luff are all tied at exactly the same distance. If any of the ties are tighter or looser, it will wrinkle the sail parallel to the boom. That does not mean that the luff itself is too loose, it means that the luff is not tied evenly.
|
 |
 |
|
 |
 |
TOP PREVENTER – Very important luff control!
The most important sail tie is the one at the top corner that pulls the sail down. It is a luff tension regulator called the Top Preventer. It also controls the sail height, keeping it inside the marks of the mast if tied properly.
What would happen if the preventer is so tight that the sail is smooth in the luff, but the Top Preventer is loose? Well, the sprit pushes the sail higher and if nothing is stopping the sail it would probably come out of the mast. At least if you don’t get to that point, the luff will be really tight because the vang pulls the sail down, the sprit up, and nothing is stopping it.
In heavy air you want the sail to be as low as possible, especially if you are light. Tension the top preventer in a way so that the sail in the moves down to the lower part of the marks in the mast. In light air you want the sail higher, look at the marks and tie the top preventer in a way that the mark of the sail is on the highest part of the marks in the mast.
The standard length for the ties is:
Corners (tack, clew and throat): five 3 mm wide, 60 cm/ 24″ long.
Grommets: twelve1.5 mm wide, 50 cm/19″ long.
MAST RAKE
Mast rake should be set according to your weight. It is measured from the top-aft of the mast to the edge of the deck, coaming, in the transom. Adjust the mast step in the bottom of the boat to get to one of these settings.
Here is the range for each weight.. The length range for the different weights is between 2.78 – 2.86 meters.
Less than 40 kg: 2.79 meters
40 to 45 kg: 2.80 to 2.83 meters
45 to 50 kg: 2.83 to 2.84 meters
More than 50 kg: 2.84 to 2.85 meters
In wind conditions over 20 knots we advise that you rake aft 2 cm on all these measurements for all skipper weights.
HIKING STRAPS
Usually hiking straps come in a standard position and length and are screwed to the hull. However, it is very important for your comfort and effectiveness to have them the exact length for your size. When you hike you should be leaning parallel to the water with the back of your knees on the sheer of the hull. You’ll get the most out of it when your body is flat.
SUMMARY
IMPORTANT THINGS TO CONSIDER FOR TOP PERFORMANCE IN YOUR OPTIMIST:
- Always have a wind indicator, you can’t sail without it, you’ll need it for the downwind run to know when you are sailing by the lee or too high.
- The boom has to be above the leeward corner of the hull’s stern when sailing upwind.
- Sail the boat flat when sailing in wavy and puffy conditions. In light air it’s better to heel a bit to leeward but sit down inside, as far forward as you can, right next to the board.
- The sail should be all the way out when sailing downwind.
- The center board should be all the way up when sailing downwind. Since the sail is not pushing you sideways there’s no reason to have the board down, it will only slow you down (see picture).
- When you hike, make sure you are flat and all the way out.
- Remember the two main controllers of the luff: the Vang and the Preventer.
- The two main controllers of leech are: The Vang and Sprit.
- Release the sprit in light to medium air on the downwind leg, but do it once you are sailing down, and trim it back on before rounding the mark.
- Have the handle of the sprit line close to the cleat.
- It’s a good idea to have two vangs ready to be used in case one gets cut.
- The line for the vang should be 6mm thick.
- The standard length for the sail ties is:
- Corners: five 3 mm wide, 60 cm/ 24″ long.
- Eyelets: twelve1.5 mm wide, 50 cm/19″ long.
Thanks again for your purchase of a North Sail for your Optimist. We hope you get a lot of enjoyment out of this sail and your boat. If you have any questions on how to make your boat and sail go faster please do not hesitate to contact me.